|
01-06-2011 Necessity being the mother of invention, I recently set about to find a way to repair the fuel gauge sender on my '85 CFI Vert.
The '83-'86 CFI and EFI fuel gauge senders, Ford part number E3ZZ-9375-C, are no longer available from Ford, and none of
the usual sources are able to find NOS ones anymore. What's worse, they are not reproduced by anyone in the aftermarket,
even though they seem to have a higher failure rate than the senders for the carbureted cars, which are reproduced. I don't
know if it's because the people selling the senders are unaware of the unique nature of these senders, but whatever the reason,
I really like having a gas gauge that works. The '83-'86 CFI/EFI sender is very different from the sender for the carbureted cars. It's actually a lot like the sender for the
'87-'93 cars, but the resistance range is 80 Ohms empty and 10 Ohms full, while the '87-'93 sender is 10 Ohms empty and
165 Ohms hen the tank is full. Since I wasn't having any luck finding the E3ZZ sender, I started looking around for other Ford
senders that could be used as organ donors, to repair my existing sender. The CFI/EFI style senders use a ceramic printed circuit resistance strip, unlike the wire-wound resistor elements in the carbureted
cars. Over time, wear and corrosion from oxygenated fuels take their toll, and the result looks like this- 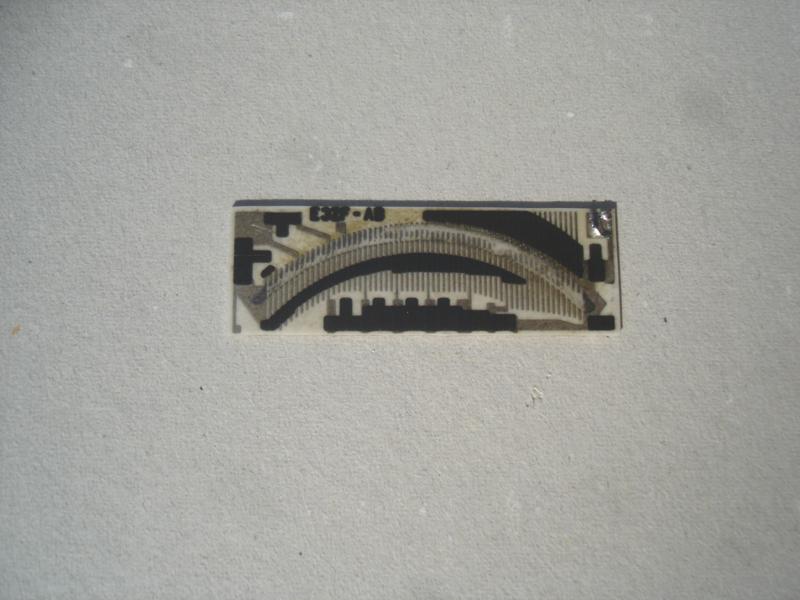
For this particular sender repair, I ended up finding a donor from a very unexpected source. Dorman Factory Solutions makes
a line of factory replacement fuel gauge senders, and the one I used is for, of all things, the 1984-1987 Tempo/Topaz, 2.3 Liter,
without fuel injection. Who knew? This sender is Dorman part number 692-120, or Ford part number E63Z-9275-A. Here is the donor sender, alongside the original unit from my '85 (the grungy looking one).  The senders are very different, but that doesn't matter, because we're only going to use one part. Well, maybe two, if your
original float is not serviceable. It may be possible to use more of the parts from the donor sender, but there are differences
that would make that a bit more work. More about that in just a bit. First thing we need to do is take the senders apart. The float arm is a press fit into the old sender, and will need to be pulled
out before removing the sender cover. I used a pair of needle-nose pliers to gently lever the arm out of the wiper. On the new
sender, the float arm is a bit easier to remove. Once the float arms are off, the housing unclips from the metal backing plate,
leaving you with something that looks like this- 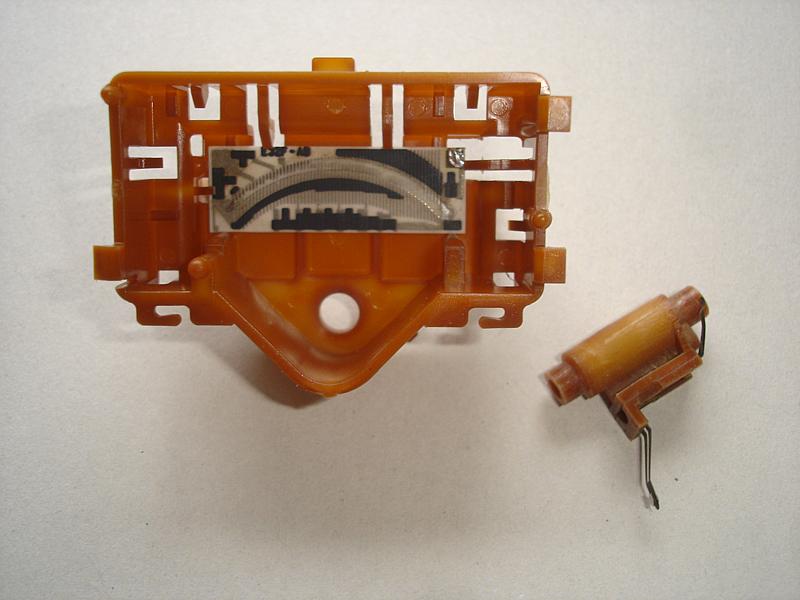
(Yours will still have a wire soldered to the resistance strip.) The new sender had some of it's pins heat-smashed on the back side of the plate, but once I trimmed those, I was able to unclip
the housing just as I had with the original. Here is a comparison view of the old and new housings and wipers- 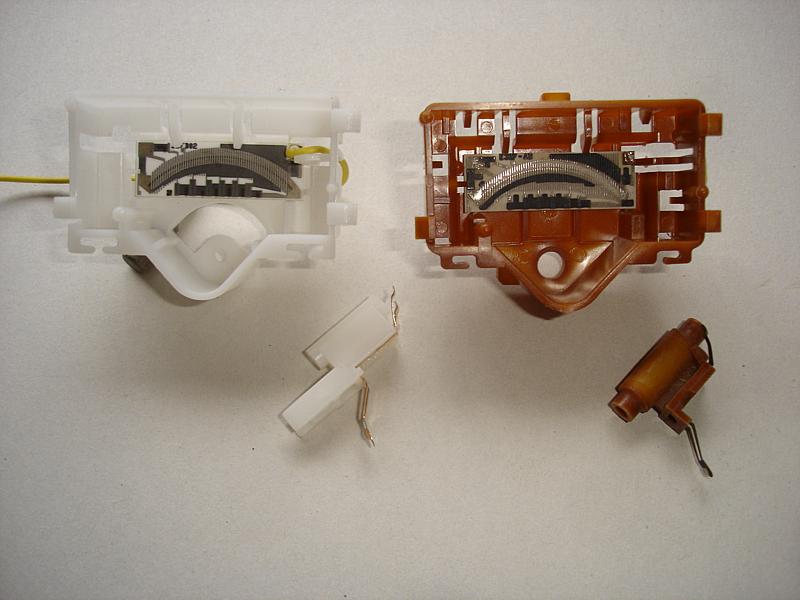
Notice how the plastic housing for the new sender has a smaller pivot hole. The original wiper pivots in the housing and plate,
while the new wiper uses the metal float arm rod as the pivot. The newer style also has a portion of the wiper passing through
the housing, to limit travel, vs the molded pegs on the original.
In this view you can see the different size pivot holes in the metal backing plate-
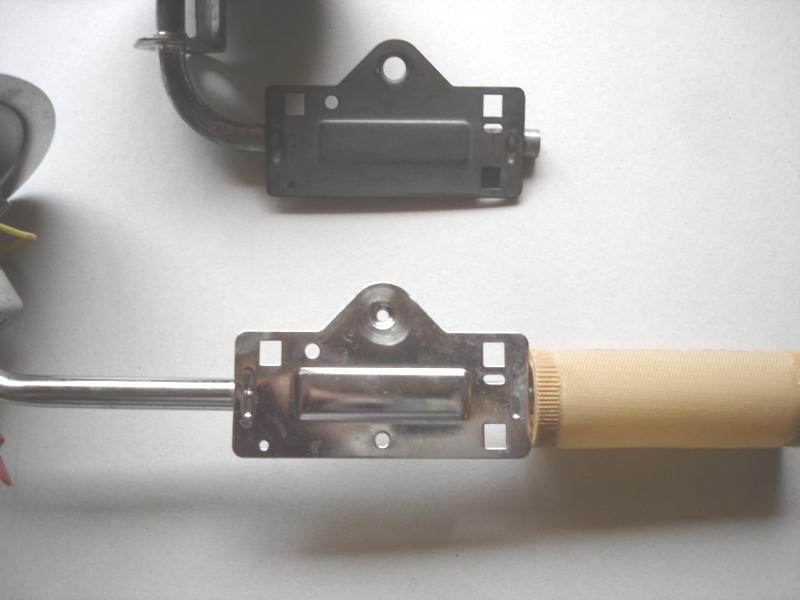
If you were to want to use the newer style cover and wiper, this plate would need to be transfered over, or you would need to
come up with a way to reduce the size of the pivot hole. I didn't need to do this, so the only thing I used from the donor sender
was the resistance strip itself. To remove the resistance strips from their housings, push back the three springy tabs, while gently lifting up on the resistor
strip. Don't force anything or the ceramic will break. What you should have now will look something like this- 
At this point, you have a decision to make. If you're not comfortable with soldering, or don't have the proper tools, the wires can
be cut and spliced. I elected to go the soldering route with mine. If you're soldering, t's your choice whether you want to do
that before or after the strip is in place. Installing the replacement strip is a lot like taking it out. Clip the end of the strip under the fixed guide on the left, then use
gentle pressure on the strip, while pushing back the springy tabs. Don't just try to shove it past the tabs, unless you just like
playing the odds. When you're done, it should look like this- 
Before you reassemble the sender, you'll want to lay the wiper in the housing, to make sure it contacts the resistance strip
properly. Also, if there is any sign of corrosion on the backing plate where the wiper contacts rub against it, you'll need to
carefully clean the area. Then, it's just a matter of putting the housing and wiper back onto the back plate, and reinstalling
the float arm. To reduce the possiblity of damaging the wiper contact, it's best to at least start the float arm into the wiper
before you snap everything together. The arm should index with the wiper like this-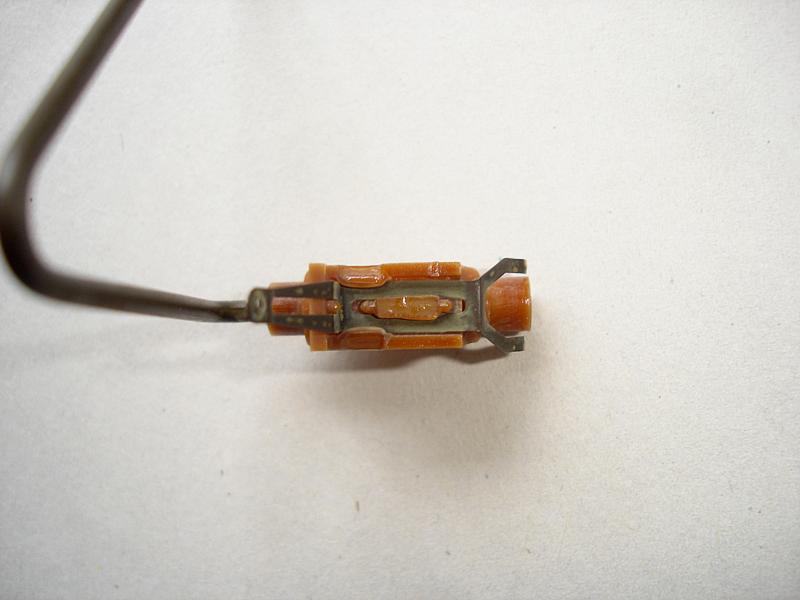
I omitted the housing in this photo for clarity. You will need to pass the float arm rod through the hole in the cover and then
into the wiper arm, before assembling everything onto the back plate. Make sure you do not deform any of the contacts. You can test the finished product with an Ohm meter connected across the two pins in the connector. With the float hanging
at full droop, you should read about 70-80 Ohms. As you move the float arm to the upper stop, the resistance should smoothly
decrease down to 10 Ohms. The new sender comes with a new O-ring seal and lock ring. My original lock ring was nicer than the new one, but I did use the
new O-ring. And finally, what would any good repair article be without... 
|


